Composting - the circular economy starts at home.

My two bin composting system
It is great to see more people wishing to grow their own food, as it such a rewarding thing to do. Food that is harvested fresh from a home garden has so many advantages compared to supermarket bought produce:
- You know where it has come from
- The food miles or carbon foot print needed to get it to you are minimal
- You can grow produce that is not common in supermarkets (gooseberries, rhubarb, heritage varieties...)
- Fully ripened, freshly harvested produce tastes so much better than store bought
- More health giving nutrients are contained in fresh food than produce that has often been harvested a week or more before (B and C vitamins degrade when exposed to air, heat and light).
It is easy to grow food in any sized property, whether you have a large garden or tiny flat, all you need is soil, water and sunlight. In a smaller property with very restricted space containers or pallets can be used.


With a large property you can build a mini market garden with an extensive variety of fruit and vegetables.

Our veggie garden, early spring planting and sowing

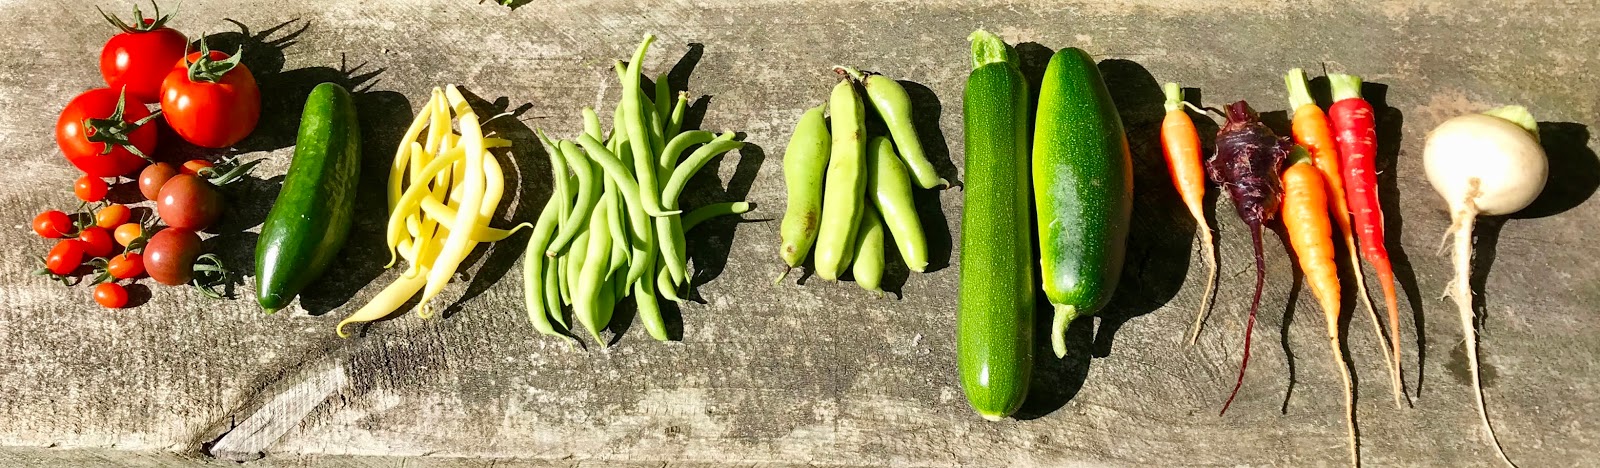
Summer harvest

Autumn harvest
If you have ample sunlight, water and warmth, it is the quality of your soil that then determines plant health and there are a multitude of variables that need to be taken into account:
- Soil pH is the acidity or alkalinity of the soil and this can vary a lot depending on the geology of your area or past land use. Most plants thrive in a pH range of 5.5-7.5, but some plants prefer more acid soils and some prefer slightly more alkaline soils.
- Soil structure is determined by the natural dominance of clay or sand etc (there are six main soil types) and whether you have good drainage or a history of overuse or high inputs of different materials. A simple squeeze test can help determine the type of soil you have and again, different plants thrive in different soils.
You can do testing to determine the pH level of your soils and you can add fertilisers and other additives from garden centres. However, this can be costly and complicated to get the best results and there is a more straight forward system of improving general soil quality and health...COMPOST!
In the end the most important element for healthy soil is the amount of humus it contains. Humus is the dark brown organic material created by decaying plant and animal matter. In natural circumstances it provides the topsoil on top of the sand, clay, gravel etc that may dominate your local geology. Humus readily absorbs and holds water, supports worms and contains heaps of nitrogen and minerals essential for plant health. It can take centuries to naturally build a good layer of humus in a top soil and many farmers are rediscovering the value of humus (regenerative farming) after a reliance on artificial fertilisers and sprays which had depleted it. However, for home gardeners building a healthy layer of humus rich topsoil is relatively easy and cheap by just adding compost.
The environmental challenges created by our increasing consumerism and high waste economy are beginning to hit home. Increasing amounts of waste are ending up in landfill and New Zealand currently produces around 15.5 million tonnes of waste a year and around a tonne a year for each household. Obviously plastic is a huge problem, but so is the amount of organic waste we produce.
Many people are discussing the need to change the way our linear global and national economies currently operate (extraction - production - consumerism - waste) so that we end up with a circular economy. In a circular economy there is no "end of life" for products and produce and we consider what was previously waste as a resource for feeding back into the economy. Rare metals and plastics etc can be recycled and repurposed and food waste can be deliberately used to produce energy or to make compost.

Most western countries throw out around a third of total food produced and a good amount goes to landfill where it is mixed up with other waste and produces methane. At an individual level we can make a difference by only buying what we can reasonably consume and then use our food scraps in more productive ways.
HOW TO MAKE COMPOST
Collection
Depending on the system you plan to use there is potentially a wide variety of material that is compostable. Compost is generally made up of two main elements 'browns' and 'greens'.
Browns are the dead or dry material (fallen leaves, dead plant stalks, straw, paper and cardboard etc) full of carbon and carbohydrates. Browns provide food for compost organisms, add bulk and allow air to filter through and stopping the heap from turning into anaerobic sludge.
Greens are high in nitrogen or protein and include lawn clippings, weeds, kitchen food scraps, seaweed and coffee grounds. Greens add useful heat to the compost and help multiply micro organisms.
Basic
We have a large bucket under our kitchen sink where we place all food scraps (apart from pumpkin seeds and potato peelings - which tend to sprout - and fruit stones that don't break down quickly). We also include paper towels used for cooking purposes. Any sized container, with a lid, could be used depending on what is practical in your own situation.

If you are keen to try some more sophisticated systems you could try the Bokashi system or a worm farm.
Bokashi
This is basically a process that ferments or pickles your waste. It produces a fluid that can be added to water to use as a liquid fertiliser and the fermented scraps can be then added to another composting system. Because a composting process has already been started it is a useful turbo charge for your compost heap. You can buy commercially made buckets and a "sprinkle" or starter that is regularly added to the contents to cause the fermenting process. This process creates a sweet smelling concoction.
However, you can make your own by fitting one bucket into another so that there is a space between them at the bottom and making some holes in the bottom of the top bucket. This allows the fluid to drain through into the outside bucket, which can then be poured out for future use. The sprinkle can be made from a variety of material but an easy recipe uses sawdust and molasses.

Composting systems
Worm farm
This system is a step up from bokashi because the worms turn the food scraps directly into compost and a rich "worm tea" is also produced which is an excellent liquid fertiliser. Tiger worms are at the centre of this system and they are very efficient, eating their own weight each day and quickly turning food waste into compost. However, they can't manage large quantities (unless you have a large system) and they cannot digest dairy products, processed food, citrus fruit, or members of the onion family.

Trenching
This requires no bins and allows you to add your gathered material directly to to the garden. If my compost bins are full, I use this method but it can be used as your main system.
All you have to do is dig a trench in your garden bed, place the scraps in it then cover with soil. You can plant above it but it is best done in a bed that will be used a month or so later. It doesn't quite work as well as adding already made compost to your garden but requires no seperate bin.

This method can also be used for large pots if you place a small amount of soil at the bottom of the pot, add some food scraps than fill again with the majority of the soil.
Easy bin system
This is my current system that I have developed over the years, requires minimal management and produces great compost.

I use two square bins that are around 80-90 cm wide (see top image). These can be made of a variety of materials as long as you can add or remove layers relatively easily. You could use wood from free pallets but macrocarpa would last longer and I wouldn't use treated wood because of the arsenic and other chemicals used in the treatment process. I also use some heavy duty black polythene to cover them to retain heat and limit pests and place bricks on top to hold it down.
In one of the two bins I throw all my food scraps, lawn clippings, leaves and weeds in no specific order. I try and minimise the seed heads, but many weed seeds are destroyed if you can get some good heat generated from your compost. There is a general rule that you should have about three parts brown material to one part green (see collection description above). I usually cover food scraps with a layer of lawn clippings or weeds to discourage pests like rats. Some general tips:

A short video about my two bin system
In the end the most important element for healthy soil is the amount of humus it contains. Humus is the dark brown organic material created by decaying plant and animal matter. In natural circumstances it provides the topsoil on top of the sand, clay, gravel etc that may dominate your local geology. Humus readily absorbs and holds water, supports worms and contains heaps of nitrogen and minerals essential for plant health. It can take centuries to naturally build a good layer of humus in a top soil and many farmers are rediscovering the value of humus (regenerative farming) after a reliance on artificial fertilisers and sprays which had depleted it. However, for home gardeners building a healthy layer of humus rich topsoil is relatively easy and cheap by just adding compost.
The environmental challenges created by our increasing consumerism and high waste economy are beginning to hit home. Increasing amounts of waste are ending up in landfill and New Zealand currently produces around 15.5 million tonnes of waste a year and around a tonne a year for each household. Obviously plastic is a huge problem, but so is the amount of organic waste we produce.
Many people are discussing the need to change the way our linear global and national economies currently operate (extraction - production - consumerism - waste) so that we end up with a circular economy. In a circular economy there is no "end of life" for products and produce and we consider what was previously waste as a resource for feeding back into the economy. Rare metals and plastics etc can be recycled and repurposed and food waste can be deliberately used to produce energy or to make compost.

Most western countries throw out around a third of total food produced and a good amount goes to landfill where it is mixed up with other waste and produces methane. At an individual level we can make a difference by only buying what we can reasonably consume and then use our food scraps in more productive ways.
HOW TO MAKE COMPOST
Collection
Depending on the system you plan to use there is potentially a wide variety of material that is compostable. Compost is generally made up of two main elements 'browns' and 'greens'.
Browns are the dead or dry material (fallen leaves, dead plant stalks, straw, paper and cardboard etc) full of carbon and carbohydrates. Browns provide food for compost organisms, add bulk and allow air to filter through and stopping the heap from turning into anaerobic sludge.
Greens are high in nitrogen or protein and include lawn clippings, weeds, kitchen food scraps, seaweed and coffee grounds. Greens add useful heat to the compost and help multiply micro organisms.
Basic
We have a large bucket under our kitchen sink where we place all food scraps (apart from pumpkin seeds and potato peelings - which tend to sprout - and fruit stones that don't break down quickly). We also include paper towels used for cooking purposes. Any sized container, with a lid, could be used depending on what is practical in your own situation.

our compost bucket
If you are keen to try some more sophisticated systems you could try the Bokashi system or a worm farm.
Bokashi
This is basically a process that ferments or pickles your waste. It produces a fluid that can be added to water to use as a liquid fertiliser and the fermented scraps can be then added to another composting system. Because a composting process has already been started it is a useful turbo charge for your compost heap. You can buy commercially made buckets and a "sprinkle" or starter that is regularly added to the contents to cause the fermenting process. This process creates a sweet smelling concoction.
However, you can make your own by fitting one bucket into another so that there is a space between them at the bottom and making some holes in the bottom of the top bucket. This allows the fluid to drain through into the outside bucket, which can then be poured out for future use. The sprinkle can be made from a variety of material but an easy recipe uses sawdust and molasses.

Composting systems
Worm farm
This system is a step up from bokashi because the worms turn the food scraps directly into compost and a rich "worm tea" is also produced which is an excellent liquid fertiliser. Tiger worms are at the centre of this system and they are very efficient, eating their own weight each day and quickly turning food waste into compost. However, they can't manage large quantities (unless you have a large system) and they cannot digest dairy products, processed food, citrus fruit, or members of the onion family.

Trenching
This requires no bins and allows you to add your gathered material directly to to the garden. If my compost bins are full, I use this method but it can be used as your main system.
All you have to do is dig a trench in your garden bed, place the scraps in it then cover with soil. You can plant above it but it is best done in a bed that will be used a month or so later. It doesn't quite work as well as adding already made compost to your garden but requires no seperate bin.

This method can also be used for large pots if you place a small amount of soil at the bottom of the pot, add some food scraps than fill again with the majority of the soil.
Easy bin system
This is my current system that I have developed over the years, requires minimal management and produces great compost.

Compost bin design using boards and pegs that allow layers with gaps for better air circulation
I use two square bins that are around 80-90 cm wide (see top image). These can be made of a variety of materials as long as you can add or remove layers relatively easily. You could use wood from free pallets but macrocarpa would last longer and I wouldn't use treated wood because of the arsenic and other chemicals used in the treatment process. I also use some heavy duty black polythene to cover them to retain heat and limit pests and place bricks on top to hold it down.
In one of the two bins I throw all my food scraps, lawn clippings, leaves and weeds in no specific order. I try and minimise the seed heads, but many weed seeds are destroyed if you can get some good heat generated from your compost. There is a general rule that you should have about three parts brown material to one part green (see collection description above). I usually cover food scraps with a layer of lawn clippings or weeds to discourage pests like rats. Some general tips:
- I use our lawn mower to run over hedge clippings, large leaves or twigs to break them down to a more easily compostable consitency.
- Woody brassica stalks should be crushed (I use a brick) or chopped up to speed their decomposition.
- I grow comfrey which has multiple uses as a natural fertiliser, but its leaves are a great additive to a compost heap as a starter and activator.
- I collect small woody branches and twigs that cannot easily be mowed over and use an electric chipper to turn them into chip that can be then added to the compost.
- If I prune a tree I remove all the small twigs and leaves for composting (these can be mowed over too) and chop up the largest parts for firewood.
- Our compost bins are full of ordinary worms and these have become naturally present over time. However, finding a few elsewhere in your garden and adding them to your compost would be helpful in the beginning. They will breed quickly.
- You will find that once you have a fully functioning bin that the worms and heat etc will quickly break things down and more space will be created.
- Lawn and hedge clippings add some useful mass and nitrogen that also helps create heat.
- Seaweed gathered from a local beach is a very useful addition to your compost. Larger hunks of kelp etc should be chopped up.
- It places the most recent material to the bottom and the mostly composted material to the top, this can be used immediately.
- It allows you to break up larger clumps and add more air to the heap generally.
- If the heap is too dry you can add water and if it is too wet you can ensure it is transferred loosely to help reduce moisture levels.
- The other bonus of transferring the compost is discovering the odd teaspoon, vegetable peeler or secateurs that were accidentally thrown out. They can be more readily rescued if they haven't been embedded too long in the heap.

A short video about my two bin system
These are some other alternatives that could be considered:
Rotating compost bin
If you have limited space a rotating bin can produce a good amount of heat and some quick compost, however, you will always end up with a mixture of good compost and material not fully composted.
You can purchase commercially made bins or make one from a plastic barrel a few boards and some wheels.

Plastic Compost barrel
These can be purchased at hardware stores but I have had limited success with them. It is difficult to get air circulation and you need to ensure that you have a good mixture or layers, including woody material that is high in carbon. If not managed well you can end up with a mass of smelly anaerobic mush. I would advise that you place them on the ground to allow contact with the soil and allow the entry of worms etc.

Compost use
There are many ways to use compost.
- Spread as a mulch around plants to better retain moisture
- Added to raised beds before planting
- Replace tired soil in a greenhouse. I do this every three years and spread the old green house soil around our flower garden.
- Sift the compost through a bought or home made sieve to create a finer potting or seedling mix.
- Spread thinly on your lawn for natural fertiliser if you regularly use a catcher.
- Build mounds around your potato plants to increase yields.
- If you have a surplus it is great to fill sacks and give away.

fresh compost in the green house
POSTSCRIPT
A lot of my links are to the Auckland website https://compostcollective.org.nz/ which contains lots of very useful information and tips on different composting systems.
Another useful NZ site is from the Wanaka Wastebusters, who have a number of practical videos from "Dr Compost": https://www.wastebusters.co.nz/compost/
Comments
compost plants i'm glad to read this blog .